Sunday, December 14, 2014

Be Still

I need to be reminded each day to put my worries and trust in God. I decided a sign would really help with that. This way every time I see it I will be reminded. I settled on be still and know that I am God. I like this passage because it lets me know that I don't have to have everything figured out. If I trust that God will see us through, then I don't need to worry. I can just be still. 

I had some sign blanks that I made up out of pallet wood lying around so I chose a smaller one. Of course this is another thing I made with the intent to sell but I figured this was more important and I still have a larger sign blank that I can sell. I had already stained it so it was ready to be painted. It would have been fairly easy to print the words out and then use carbon paper to copy it on to the board.  There were two problems with that though, first I don't have much ink left in the printer and second the board was larger than a sheet of paper and I don't have a program to print it at the right size. So I brought the board over to my laptop, searched for a printable of the quote, and copied it on to the board with pencil. This doesn't leave you with as perfect a look as the previous method I mentioned but it's what I had to do. Then I used a small paint brush to paint over the pencil. It's actually easier to write with the paintbrush because as you turn and such the brush is forced to make a pleasing curve. I actually recommend you just use your pencil lines as a reference and let the brush do it's thing. After it has dried you can erase any pencil marks you see and it's ready to hang. It probably won't bother most people but I wish the words were just slightly moved to the left. Of course it's ironic that it bothers me because wanting everything perfect was one of the reasons to make the sign in the first place.

Friday, December 12, 2014

My dad is better than your dad

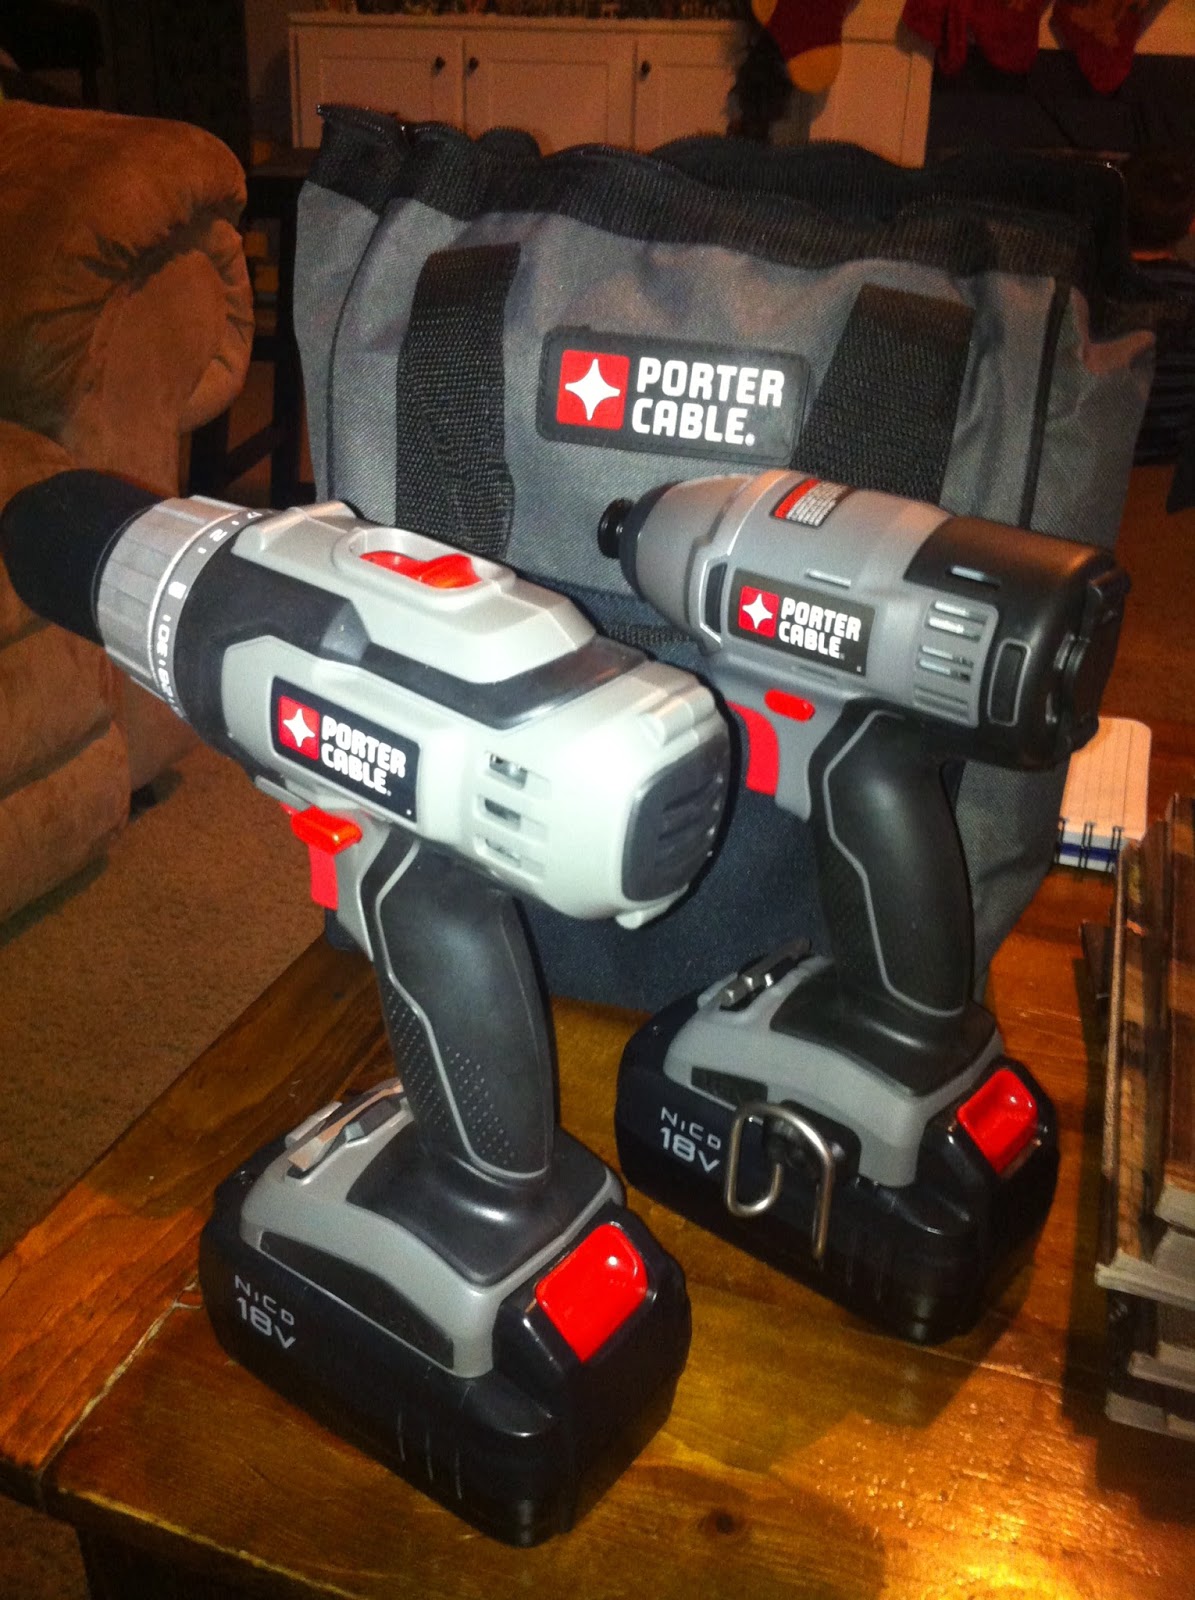
My dad has worked at his job for twenty years now. A job that he has to drive about 45 min to get to each day. His work decided twenty years gets you a nice gift. He got to choose what he wanted and he picked a combo drill and driver kit. It came in and he wanted to give it to me. I said no of course, he deserved it. I mean twenty years, come on!  He said he already had some, so I said why don't you just give me the old ones then. He said he couldn't do that because they were a gift from us kids. I was stuck at an impasse. He told my mom that if I could lift the bag they were mine. Of course I could lift it. So that's how I ended up with these beautiful babies. 

Up until now I had one drill. I chose a corded drill that was fairly inexpensive at the time because I had always had bad luck with batteries. They go out when you need them, they don't hold a charge that sort of thing but I've come to love them for their portability and especially on these ones, balance. The drill I have now is a power horse but has no adjustable torque, so it pretty much strips most the screws I use unless I try to be very careful.  I also only had one drill, so I continuously had to change back and forth between the drill bit and the screw bit, which actually wears on my hands. Now, especially when using pocket holes, I can drill with one and use the impact driver to screw in the screw. No changing back and forth. This will really cut down my construction time and I won't have stripped screws all the time, which is the fastest way to get me cursing in the shop. 

I'd also like to mention that I've always stolen his tools if I could lift them. I have several of his tools on long loan in my shop at this moment, and even though I treat them with respect now, I used to mess them up. Like the time I took his hammer and chisels to split rocks in the backyard to see what was inside. And other times when I took them even after he told me not to, then left them outside to rust.

So thanks Dad, you're the best!

p.s. my mom is also better than your mom.

Friday, December 5, 2014

Christmas package

My brother just got the package our family sent him for Christmas, so I can post those gifts now. He moved to New York to attend seminary so it's our first year without him. I made a few things for them and my nephew. My nephew is at the perfect age for wood gifts. It seems most ideas are for toddler boys. So I made him two things. First is a kangaroo that hops down a ramp if you set it at the right angle. I found this idea on you tube. Here's the video hopping kangaroo toy.  And here's the pattern to make your own kangaroo pattern.

Here it is in action before I dyed it red.


I also made him a truck and used more of the eucalyptus from my childhood home's backyard. It's the brown wood sides of the truck.


My husband discover the truck could haul the kangaroo.


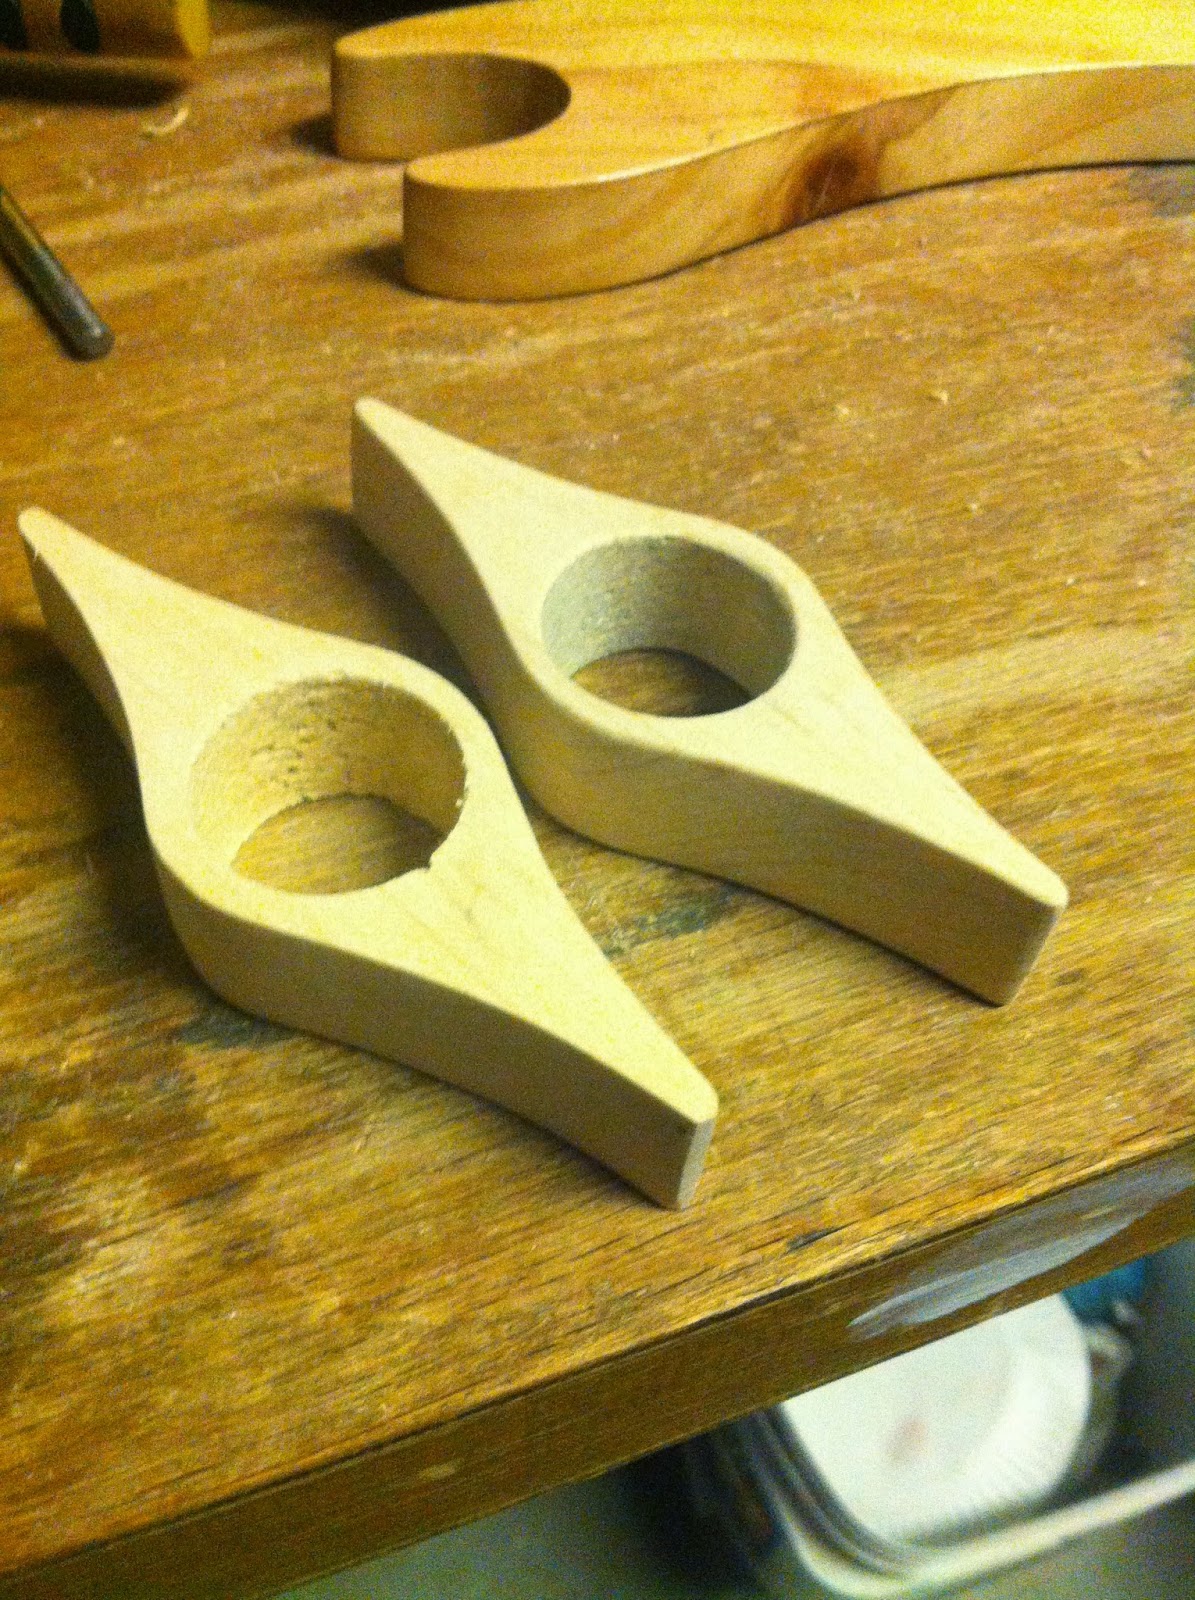
I also made my brother and his wife some reading assistants. I got the idea and templates from one of the woodworking sites I frequent called The Carmicheal Workshop reader's assistant. He has some great content and videos to check out. The picture is before finish sanding and shellac.


Tuesday, December 2, 2014

More Christmas Gifts

I've been plucking away at gifts lately. Everything else is pretty much on hold till I finish them all. Every year I make my godson (my nephew) a nativity. I don't know how long I'll continue this because eventually they'll end up with a ton of nativities, but it's fun to find one that's age appropriate. Last year it was a felt nativity because he was two. This year my other nephew was interested in having his own nativity so I made two. I got some peg people at the store and saw a similar idea on pinterest for inspiration. This one is my older nephews nativity (he's almost six) that he painted himself. He wanted to take it home right away of course, so it's without some of the extras of my godson's nativity. He knows which person is which but I don't. Except Flash who very few people know was actually at the birth of Jesus. He's right up front on the right.


After seeing the roof part was a bit taller than it needed to be I trimmed my godson's to make it shorter. I added rafia to the roof and the manger. I also added a sheep and donkey. Sweet little eight pound six ounce baby Jesus will probably be removed from the nativity until Christmas Eve, and I still have to spray a finish on these, but miracle of miracles in this drought, it's been raining all day.


Last but not least, and really not last, because I also have gifts I still can't show, is my son's toolbox. I got him some of the kids tools from Lowes. They have them with their kids projects of which I also got a toy car to assemble. I like these tools because they are real metal tools but kid sized. This is my effort to get him interested in what I do and out in the shop working with me. He does show some interest until I fire up a loud tool, so we shall see.


Monday, November 24, 2014

Toys

I love working on toys. I can work on them all day and not get tired of it. I'm a little sad because my son's gift that I'm making him this year is almost finished but I'm so happy with the way it's turning out that I had to show it off. For the last two years my son has wanted the teenage mutant ninja turtle sewer lair playset for christmas. This thing is four feet tall and about eighty bucks, down from the two hundred it was last year. I can't justify that, let alone the amount of space it would take up in his room and the cost of the turtle action figures. Here's the playset.


 This year they have come out with smaller versions of the turtles called half shell heroes that the boys and myself really like. They are a lot like the imaginext toys which in my opinion are the best toys on the market right now. The half shell heroes cost about seven bucks each and come with a vehicle or if you get a figure other than the turtles like splinter it comes with another figure as well. The bigger turtles are about fifteen bucks a piece. Here's a size comparison to the regular sized action figures.


After these guys came out a lightbulb went on in my head. I figured I could make the sewer lair playset sized for the half shell heroes. They have since come out with a playset for the little guys but the sewer lair set is what my son always asks for. I know the size of it might be one of the selling points for him but I know he'll enjoy this one as well because he has an imaginext batcave playset that his cousins and him play with all the time. I took apart his train board that was a christmas present I made for him I believe two years ago. He's old enough now to arrange the tracks himself so he didn't need the huge board taking up space anymore and I was able to use the plywood to make the new playset. I believe I've spent about six bucks total on material for this, with most of the cost going towards buying the guys because the Leo turtle is the only one he currently has. I used scraps, material, and paint I already had on hand. It's not finished yet. I still have some detail painting to do and then I'll spray a finish coat on all of it to protect it from little hands. Here's a full view of the playset as it is now. I tried to make it look as much like the original as I could.


There's a computer here on the bottom level


Here's a shot of the tire swing and a little bit of the skate ramp. On the right you can see an orange circle. This part spins around and I'll put a computer screen or something on it that hides when you spin it back. 

The top level is street level that they can access through the manhole that opens like a door. The top part of the set is where I have to do most of the detail painting. The red is a building that needs bricks and to the left of the building I'll paint an alley way.


Sunday, November 16, 2014

Christmas Gifts

I've started working on Christmas gifts, actually I started about a month ago, but I can't show any to you, because then the recipients would also see them. So the post with ideas on Christmas gifts will come to you after Christmas, sorry. I can show you what I look like while making them. I really should pull my hair into a ponytail, but I'm hair challenged. I never had to do it because my grandma always did.

And I can show you my nephew's helicopter (because I couldn't wait and don't have gifts for all the nieces and nephew for Christmas). The dark wood I've been experimenting with. It's from a log of eucalyptus that my parents cut down years ago. It's super hard and the belt sander with 60 grit paper barely even touches it. There's a small section between the heart wood and the bark that is perfect and doesn't have any cracks. The heart wood is a deeper red color but is full of cracks. I thought it was kind of cool to add the eucalyptus wood to the toys because my dad cut the tree from our backyard when we were younger and we had to cart those logs all over the backyard. I figured out later that my dad didn't really need the log pile moved every summer so much as he needed us working every summer.
 

Tuesday, November 11, 2014

Table Saw Crosscut Sled

I've been working on a crosscut sled for the table saw the last couple of days. I also plan to make a miter saw sled as well. This will enable me to make more accurate cuts than if I just used the miter saw. Also the miter saw is my dad's and someday he'll want it back so I can still make most of the same cuts with the table saw and not really miss it. I used one of my favorite woodworkers, Steve Ramsey's design, here's the video for those interested Steve Ramsey's crosscut sled

Here's the slides that fit in the tracks on the saw and ensure the sled keeps the cut at a 90 degree angle. I made four while I had the settings set on the saw so I could use the other two on the future miter saw sled. The Craftsman table saws have little clips on the tops of the tracks that turn them into t-slides. Making the slides to fit in the tracks was a little more difficult than just a regular track. Of course I saw somewhere after, that some people just grind the clips off. I wish I had seen that before but I might still grind them off later.


Here is a great example of why you always stand to the side of the blade at the table saw. When I was cutting the bottom of the sled, which is made of a melamine board so it will slide easily, I measured from the blade to my rip fence on the front and back of the saw blade to make sure it was accurate all the way through the cut. Well because I didn't let the cam lock just lock the rip fence down I guess it was a little off, which caused the board to become more and more pinched between the fence and the blade as I ran it through. Add to that the slipperiness of the melamine and the board got pulled out of my hands, lifted up on top of the blade, spun around, hit the blade again, and then thrown back into the garage door. This is known as kick back and it's very dangerous if your standing behind the blade and the board is thrown into your body. When kick back occurs it happens at a surprising speed and most people don't realize just how fast that board will be coming at you. I was standing off to the side so the board missed me completely and luckily hit something else before it hit the garage door, saving my body and the thin garage door from a lot of harm. Here you can see the big gash the blade put on the middle back of the sled.


I attached the slides to the sled bottom by putting some washers in the saw's tracks and putting the slides on top of the washers to bring the slides off the bottom of the tracks so when i remove the washers the slides won't bottom out on the tracks making them slide more easily.


I then put glue on the slides and placed the melamine bottom of the sled on top of the slides and against my rip fence. I used the table of the then taken apart band saw to weight it down.


Next I added the front fence to the bottom piece of the sled. I made the front and back fence out of two pieces of 1/2" plywood glued together so they would be solid and straight. It's crucial to the accuracy of the crosscut sled that the front fence be lined up exactly 90 degrees to the blade. To do this I turned the saw on while the sled was over the blade then slowly raised the blade until it cut through the middle of the sled. Then I used a drywall square to set the fence against making sure it ends up at the right angle to the blade. Because the underside of the table saw isn't flat the clamps wouldn't hold right, so I just just used them to weight it down a bit while the glue dried. You can also see the slot I made in the front of the fence that will hold a bolt for the built in stop clamp.


The back fence went on pretty much the same way except I had to use a smaller speed square to fit in the space. I then flipped it all over, drilled pilot holes, drilled a countersink, and screwed the pieces in. The screws have to be countersunk so the sled can slide freely on the top of the table saw.


I added some boards across the top to act as support for the fences and also act as blade guards. These were thin pieces leftover from a pallet project so you can see the little dots of the nails that were keeping the pallet together. I disassemble pallets with a sawzall and cut right through the nails because it's a lot faster and you end up with a lot more pallet boards that are all intact.


Next I cut a piece of wood for the adjustable stop. This piece allows me to set the stop to a specific measurement so I can but a board up against it and make multiple cuts that will all be exactly the same.


Lastly I added some leftover fence pieces on the back of the sled to act as another blade guide. These blade guides all keep my body away from the blade. They are on Steve's design and aren't exactly necessary, but I spent enough time on it already that I decided a little more work making it safer was always a good decision. I didn't however take the time to make it square because it wasn't a big deal if it was a little crooked.


There you have it, a completed cross cut sled. I used some paste wax on the slides, bottom of the sled, and top of the table saw so now it slides like a dream.


In other news, I got the new tires in for the band saw. After installing them and a bit of adjustment by both myself and my dad it is up and running. I actually trimmed the stop piece on the sled using the band saw and the blade stayed lined up just fine after cutting. I'm so glad it's working for now. My dad and I probably stood staring at it and adjusting it for about a whole day just trying to get it to run properly and this was after fixing the busted piece. Also my son decided he wanted his plane red so he painted it. It has since been stepped on by his little cousin and repaired. I guess he likes the Red Baron. And here I thought he was a Snoopy fan.


Saturday, November 8, 2014

Harbor Freight

If I liked parties and I could have my birthday party at Harbor Freight, I would. They may not have the highest quality tools, but for those of us who don't create intricate furniture replications, the tools hold up just fine and they are great deals. I went the other day to look for some odd sizes of sandpaper for my disk sander and they didn't have them but I had to really restrain myself from spending a fortune there. I did get a little wooden plane kit that cost about two bucks to put together with Dylan and while he started out helping me, it soon became apparent that this was gonna get complicated. I've been gluing on a new piece each time I go out to work on a project and it's finally finished. You can see that the instructions look as if you could literally build a full size airplane and take off in it. 

Thursday, November 6, 2014

Minnesota

I got a request for a project and since we will be getting a new puppy tomorrow, I was able to complete most of it today. I still need to spray some finish on it but that won't be difficult. One of our friends is from Minnesota so this was the request.

I took two pallet boards for each section and I edge joined them with glue and pocket holes on the back. Then I just laid them out and used a scrap board to keep the space in the middle consistent. I drew the shape free hand (just like the deer pallet project) because I didn't wanna mess with printing out a pattern and my printer is low on ink anyway. Then I cut the shapes with a jig saw. A little sanding and dark walnut stain brought it to this stage. Here it is with a roll of painter's tape to show size.

I'm still chugging along on the coffee table. Sanding is probably the least fun part of woodworking, so it's going slow. I've also been working on a few little fun/learning projects because otherwise I lose motivation. I'll show those later when I've completed them.

Friday, October 31, 2014

Busy Busy

I've been pretty busy this week. The band saw just won't adjust right and it's a puzzler. All the parts work properly but it may need new tires or a new blade, not sure but we'll figure it out eventually. I finished the build of the coffee table. It just needs sanded and finished. I may wait on the finish to see if there are any takers and then they can customize the finish to their liking.


I purchased a block planer and I've been planing the sides of some pallet boards for another project. It's a bit of work, especially on the arms but it will make for a better finished look to have them fit together properly.


I got a last minute request from my cousin this week as well. He needed a little church steeple built to use at his church. Two hours Thursday and a few hours Friday morning and it was done. So on Halloween I was building a church. Not really what I expected lol. I'm hopefully gonna have some pics of it in use later on. The lighting is pretty bad in the garage but it was painted white and the doors black. In the back of the middle picture you can see my nephew who actually hangs out in the shop with me more than anyone else.


Tuesday, October 28, 2014

Halloween

It's almost Halloween and I wish I could show you the best Halloween build we ever did but there are no pictures of it and it was disassembled pretty much after that Halloween. We had a party one year and made a little haunted house on our back patio out of large sheets of black plastic that my dad got from his work. We lit it with a strobe light and had a fog machine as well. On the inside were your typical put your hand in the bowl type stuff but I wanted a coffin. My dad helped me put together a coffin with a false bottom. I would lay inside and I could lift the bottom up and the top open at the same time and sit up and scare people but when they lifted the lid the coffin was empty and they couldn't tell the bottom lifted up at all. I thought it was awesome but we didn't need a coffin laying around or have the space to store it afterwards, so we just used the boards for various other projects.  

I also remember another Halloween when my grandpa had given us a microphone and speaker system. I'm not sure if it was all assembled when we got it, but they were about the size of drive in theater speakers. My dad got the idea to stick a speaker in a dummy we made and then we could hide inside the house where we could see the kids through our kitchen window. We would wait until they said thank you or something then say you're welcome through the microphone. This was some pretty impressive stuff back then. We didn't really have this kind of stuff around unless you wanted to spend a bunch of money on it. It scared a ton of kids that year and we got a lot of fun out of it.


This year I only have a few decorations that my son wanted to put out and we carved a pumpkin but I'm sure as he gets older we'll come up with some equally fun Halloween builds. In the mean time my dad has been fixing my band saw. I was hoping I could just cut out the broken piece and replace it with the new piece but the new piece wasn't made for my exact saw and even though it fits, it still needed some fabrication. I bought a piece for a Powermatic band saw because that brand is pretty pricey and rightfully so. As I was hoping this meant the new piece I got was much stronger than the old one and with the new fabrication by my dad, it's not likely to break again. If I really misused it I could probably break it but it would probably be the remaining old part that breaks and not this new part. Because this has been such a wordy post I'll throw in a picture of the new piece. On the right you can see where the old piece broke and the bits of it left over after we cut it off of the rest of the part we needed to reuse.

Friday, October 24, 2014

Progress

It's been a few days and I've been working on a few different projects. My coffee table that will be for sale is nearly to the finish stage. I've been putting it off because it just isn't as fun to work on as other projects but I got the supplies I needed so I have to be a grown up and work on the projects for profit as well *sigh*. I will be buying a block plane though because the bin that goes under the coffee table is a bit too tall and planing it down will be the easiest way to fix that. The second picture shows the bit of overlap between the table and the bin that rolls underneath.


I'm waiting on a part for the "new" band saw. Here it is in current state. I've been cleaning some of the rust off as well while I wait.


I finished a small box that will hold some of the little ninja turtles my son is getting for Christmas. I'll paint it in a ninja turtle theme. He fell in love with the small "half shell hero" turtles which is great for me because it means everything I make for them can be smaller. I hope to build a miniature sewer lair for them based on a huge ninja turtle toy that was made for the full size action figures. He's been asking for it for the last two Christmases. Because it was about $200 last year and $100 this year and looks like a huge piece of junk, I figured this solution would last longer and not take up precious space in his room.


Monday, October 20, 2014

Band saws

I've been pretty busy the last couple of days. I said goodbye to the band saw I had for a short time. There was just no fixing it this time. Luckily my wonderful cousin had a band saw to give me. I've been looking it over and getting it ready to use. The bottom wheel's tire is a little worn but I don't think it will give me any trouble. The tensioning and alignment of the top wheel is giving me trouble so I think I'll have to bring in the big guns (aka my dad). 


I got the cabinets and table from my parents house put in. It was originally my grandma's sewing/craft table built for her by my grandpa. It's working out great. I love having the closed storage to keep things somewhat dust free. It's currently housing small cutting tools on one side and sanding tools on the other. I also love having the miter saw up off the floor. It's a huge improvement and I think I'll add some cutting extensions that I can put away when not in use. The vacuum system is still in the works but I'm making progress.

I also installed a paper towel holder to the right of the scroll saw and finishing shelves. It's come in very handy in this location. I put a cable above the shop as well and zip tied the extension cord to some shower curtain hooks to run along the cable. It didn't work as well as I'd hope and there is still a bunch of extension cord left on the floor so I'll either double it up or come up with another solution because I don't know if I even care for the cord this way.

I whipped out a little project for my younger sister to hold her blow dryer, straightener, and curling iron. I added another hole for future use or to hold a hair brush. She couldn't wait for me to paint it so it's pretty rough because I was in a hurry to cut the holes but it's sanded smooth and should be no problem. We tested it and it works great as well so I installed it for her yesterday.

I did realize upon finishing it that I had used up my rare exotic ostrich wood. Oh well it was in the scrap pile with everything else so it will be used.